There are different ways to create SSRS report in MS Dynamics Ax 2012, mostly depending upon different type of data source used for creating report. There are several ways to retrieve data for reports. In this blog, a report will be created by using Query from AOT, which displays customer data. Then parameters to the report will be added so as to allow users to filter the data that displays in the report.
To do
this the following set of tasks will be needed:
·
Define a query
·
Create a reporting project
·
Create a report
·
Add parameters to a report
Pre-Requisites
To
complete this example, the followings are required:
·
Microsoft Dynamics AX with sample data
·
Microsoft Visual Studio 2010
STEP 1 - Defining
a Query
For this example,
a query that is defined within the Microsoft Dynamics AX development
environment (AOT – can be opened by Pressing CTRL+D while running the MS
Dynamics Client Application, and having proper credential). The following
procedure explains how to define the query that will be used to retrieve data
for the report.
To define
a query
1.
Open Microsoft Dynamics AX.
2.
In the AOT, right-click the Queries node, and then
click New Query.
3.
Right-click the node for the query, click Rename,
and then type _SNMCustTable.
4.
Expand the node for the _SNMCustTable query.
5.
Right-click the Data Dictionary node, and then
click Open New Window.
6.
In the new window, expand the Tables node.
7.
Locate the CustTable table and drag it onto the
Data Sources node for the _SNMCustTable query.
8.
Save the query.

STEP 2 - Creating
a Reporting Project
To create
a Report, run Microsoft Visual Studio 2010. Then create a reporting project,
you can choose from two project templates: Visual Basic and Visual C#. Most popular
is Visual C# template.
To create
a reporting project
1.
Open Microsoft Visual Studio 2010.
2.
On the File menu, point to New, and then click
Project. The New Project dialog box displays.
3.
In the Project Types pane, click the Visual C#
node, and in the Templates pane, click Dynamics AX Reporting Project.
4.
In the Name box, type ReportModel201441103, and in
the Location box, type a location.
5.
Click OK.
A reporting project contains a model by default. A
model is a file with the .moxl file name extension.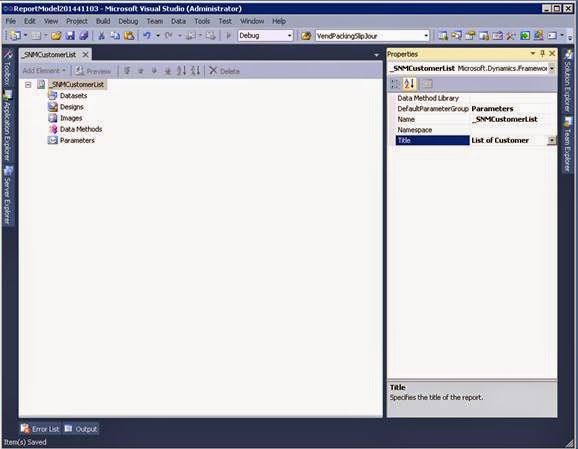
STEP 3 - Creating
a Report
After
creation of reporting project, ready to create the report. The following
procedure explains how to create the report.
To create
a report
1.
In Model Editor, right-click the Report1 node, and
then click Rename.
2.
Type CustomerList as the name.
3.
Expand the CustomerList node if it is not already
expanded.
4.
Right-click the Datasets node, and then click Add
Dataset.
5.
Select the node for the data set.
6.
In the Properties window, specify the following
values.


|
Property
|
Value
|
|
Data Source
|
Dynamics AX
|
|
Data Source Type
|
Query
|
|
Default Layout
|
Table
|
|
Name
|
Customers
|
|
Query
|
Click the ellipsis button (…). A dialog box displays where you can select
a query that is defined in the AOT and identify the fields that you want to
use. Select the _SNMCustTable query, and then select the AccountNum, Address, City, Name, Phone and
TeleFax fields. Be sure the All check box is not selected.
|

7.
In Model Editor, select the Customers node and drag
it onto the Designs node. An auto design named AutoDesign1 is created for the
report.
8.
Select the AutoDesign1 node.
9.
In the Properties window, set the LayoutTemplate
property to ReportLayoutStyleTemplate. Also, type Customer list for the Title
property.
10. In Model
Editor, expand the AutoDesign1 node, and then select the node for the table
data region.
11. In the
Properties window, set the Style Template property to TableStyleTemplate.

STEP 4 - Adding
Parameters to a Report
After
adding parameters to a report and adding a filter, to allow users to select one
or more customers for which to display data. In this example, a list box will
be displayed for selection of Customer for display. Also, more parameters will
be added so that whether to display the phone and fax numbers for the customers
in the report. The following procedures explain how to define the parameters
for the report.
To add a
parameter and filter for selecting customers
1.
In Model Editor, right-click the Parameters node
for the report, and then click Add Parameter.
2.
Select the node for the parameter.
3.
In the Properties window, specify the following
values.
|
Property
|
Value
|
|
Multi Value
|
True
|
|
Name
|
CustomerName
|
|
Prompt String
|
Customers:
|
|
Values
|
Click the ellipsis button
(...). In the dialog box that displays, click the From Dataset radio button.
Select Customers from the drop-down menu for Dataset. Select Name from the
drop-down menu for Value Field, and select Name from the drop-down menu for Label
Field. Click OK.
|

4.
Expand the AutoDesign1 node, and then expand the
node for the table data region.
5.
Right-click the Filters node, and then click Add
Filter.
6.
Select the node for the filter.
7.
In the Properties window, specify the following
values.
|
Property
|
Value
|
|
Expression
|
=Fields!name.Value
|
|
Name
|
SelectCustomers
|
|
Operator
|
In
|
|
Value
|
=Parameters!CustomerName.Value
|

8.
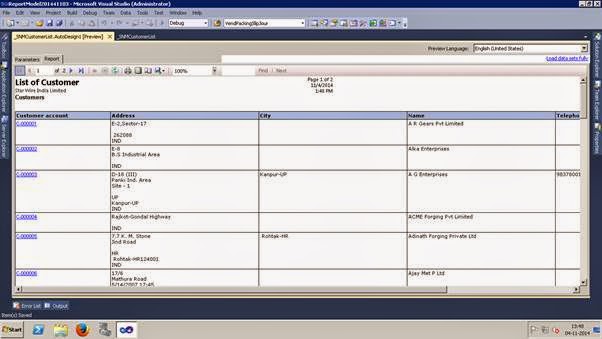
To preview the report, right-click the AutoDesign1
node in Model Editor, and then click Preview. The parameter that you defined
displays in the Parameters window.
9.
To use the parameter, select one or more customer
names from the list that displays for the parameter, and then click the Report
tab. The data for the selected customers displays.


To add
parameters that determine whether to display phone and fax numbers
1.
In Model Editor, right-click the Parameters node,
and then click Add Parameter.
2.
Select the node for the parameter.
3.
In the Properties window, specify the following
values.
|
Property
|
Value
|
|
Data Type
|
Boolean
|
|
Name
|
DisplayPhoneNumber
|
|
Prompt String
|
Display phone number?
|
|
Values
|
Click the ellipsis button
(...). In the dialog box that displays, click the Non-queried radio button.
In the first row in the table, type True in the Value column and type Yes in
the Label column. In the second row, type False in the Value column and type
No in the Label column. Click OK.
|

4.
In Model Editor, right-click the Parameters node,
and then click Add Parameter.
5.
Select the node for the parameter.
6.
In the Properties window, specify the following
values.
|
Property
|
Value
|
|
Data Type
|
Boolean
|
|
Name
|
DisplayTeleFaxNumber
|
|
Prompt String
|
Display fax number?
|
|
Values
|
Click the ellipsis button
(...). In the dialog box that displays, click the Non-queried radio button.
In the first row in the table, type True in the Value column and type Yes in
the Label column. In the second row, type False in the Value column and type No
in the Label column. Click OK.
|

7.
In Model Editor, expand the AutoDesign1 node,
expand the node for the table data region, and then expand the Data node.
8.
Select the Phone field, and type the expression
=IIf(Parameters!DisplayPhoneNumber.Value, True, False) for the Visible property
in the Properties window.

9.
Select the TeleFax field, and type the expression
=IIf(Parameters!DisplayTeleFaxNumber.Value, True, False) for the Visible
property in the Properties window.

10. To
preview the report, right-click the AutoDesign1 node in Model Editor, and then
click Preview. The new parameters display in the Parameters window along with
the previous parameter. To use the parameters, select one or more customers and
specify Yes or No for the two display parameters. The data for the selected
customers displays.

No comments:
Post a Comment